The section headings link to the corresponding topics in nanoCAD Help.
If you already use AutoCAD, the ribbon in nanoCAD will look familiar. This guide explains how to bring across the settings, support files and tools you rely on every day.
User interface
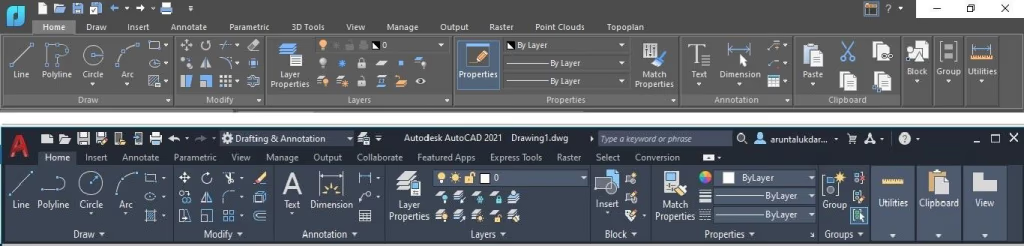
Both programs group commands into tabs and panels. If you prefer the classic interface, use the switch in the upper-right corner.
Command line
Use the command line to enter commands, read prompts and system messages, and choose the options available at each step.
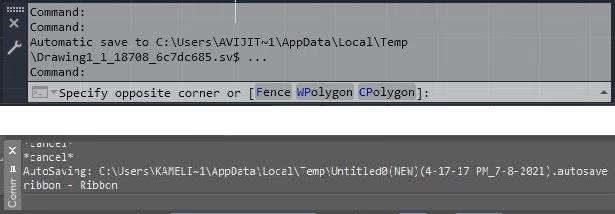
Both programs handle commands in much the same way. To see more of your command history, press F2. A text window opens with the contents of the command line. To list nanoCAD commands and aliases, enter a single quotation mark (') at the command line.
Status Bar
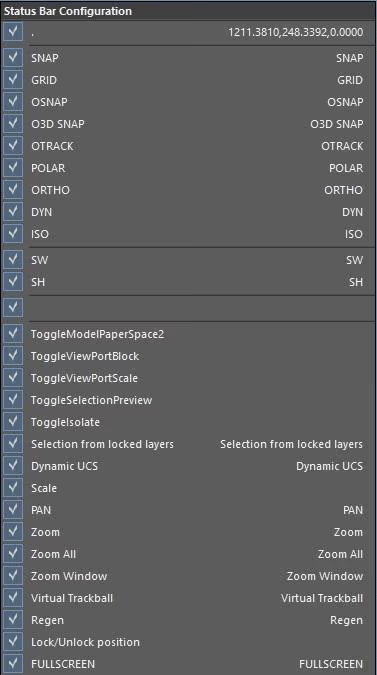
The status bar displays the cursor coordinates and gives access to the main drawing modes. Right-clicking on it opens the context menu Status Bar Settings, where you can choose which items to display.
Model and layout tabs
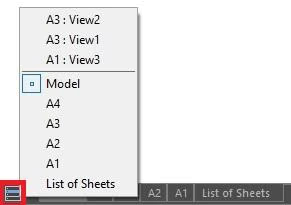
By default, nanoCAD creates four layouts with common paper sizes: A4, A3, A2 and A1. You can set the number and order of layouts in a drawing template, as described later in this guide.
Use the control in the lower-left corner, beside the drawing tabs, to switch between model space and layouts.
Toolbars
Toolbars work in both the ribbon and classic interfaces. To list the available toolbars, run TOOLBARS.
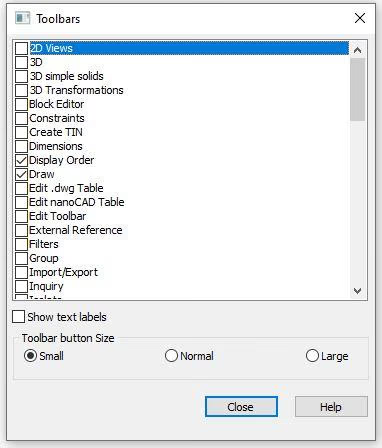
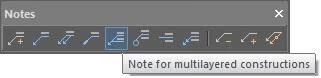
Choose which toolbars to display and set their appearance and button size. Custom toolbars appear in the same list. Hover over a button to see its command.
Interface Settings
You can choose the ribbon or classic interface, arrange the toolbars, and adjust the command line and status bar.
In nanoCAD 26, the interface configuration files are found in:
%AppData%\Nanosoft AS\nanoCAD x64 26.0\Config
AutoCAD stores many customizations in *.cuix, nanoCAD uses different formats according to the configured element:
*.cfg: classic interface, menus, toolbars, keyboard shortcuts, status bar and context menus.*.xml: ribbon configuration.*.pgp: command aliases.*.cuix: interface of additional applications.
nanoCAD stores most classic-interface settings in *.cfg. Run the command INTERFACE to open the window Customize user interface.
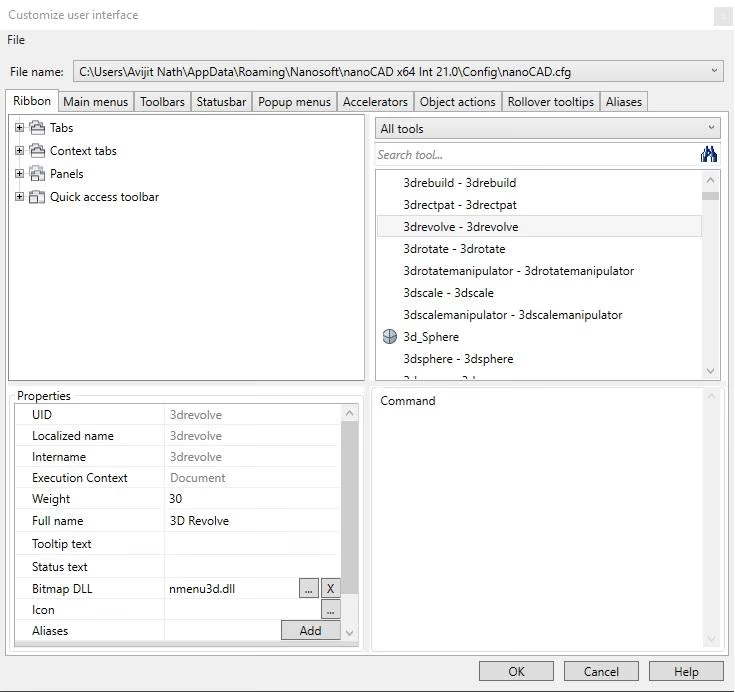
The File tab contains the commands for managing configuration files.
File options in the Customize User Interface dialog
| File |
Commands to manage configuration files:
|
|---|---|
| File Name | Displays the path and file name *.cfg The current configuration file is opened by default. |
The window is organized into nine tabs that correspond to the different elements of the interface. In the top left, the complete list of items in the selected tab appears in the tree form. To the right are the tools, commands and controls available to create or modify menus, toolbars, context menus and other components.
To quickly locate a tool you can use:
- The drop-down list: selects a category and displays only the elements in that group.
- The search: enter the name of the tool or command you need.
The bottom right corner shows information about the selected item or action. Properties in the lower-left corner lets you edit its settings.
Manage command aliases on the Alias tab. A command can have several aliases, but each alias can refer to only one command. Changes are saved automatically in the *.pgp.
After modifying the classic interface, restart nanoCAD to apply the changes. If you have only changed ribbon elements, you can update it using the command RELOADRIBBON or the shortcut Alt + R, without restarting the program.
Exporting and importing interface settings
A partial configuration file allows adding customizations without modifying the main file nanoCAD.cfg. To use the same interface in another version or on several workstations, load the appropriate *.cfg file.
Partial files can have any name. userdata.cfg is reserved for the main user configuration file. A new version won’t load it automatically when you upgrade.
Commands UIEXPORT and UIIMPORT enable quickly exporting and importing the configuration. UIEXPORT creates a ZIP package that can include:
- Ribbon panels, toolbars, menus and context menus.
- Commands created or added by the user.
- Keyboard shortcuts, object actions, tooltips and aliases.
- The type and visual style of the interface.
- Visibility, position and docking of toolbars, panels and the command line.
- The ribbon display mode.
- The size and position of the program window.
To apply the configuration to another workstation:
- Run
UIIMPORT. - Select the ZIP package containing the configuration.
- Restart nanoCAD.
Package includes file saveduistate.cfg, which records the position, visibility and size of interface elements. You can also create this file separately with SAVEUISTATE and copy it to:
%AppData%\Nanosoft AS\nanoCAD x64 26.0\ConfigProgram Options
In Options, you can choose templates, configure graphics, change the interface theme and adjust how the cursor, grips and selection boxes appear in the drawing area.
Run OPTIONS to open nanoCAD Options. The settings are grouped by topic in the navigation tree.
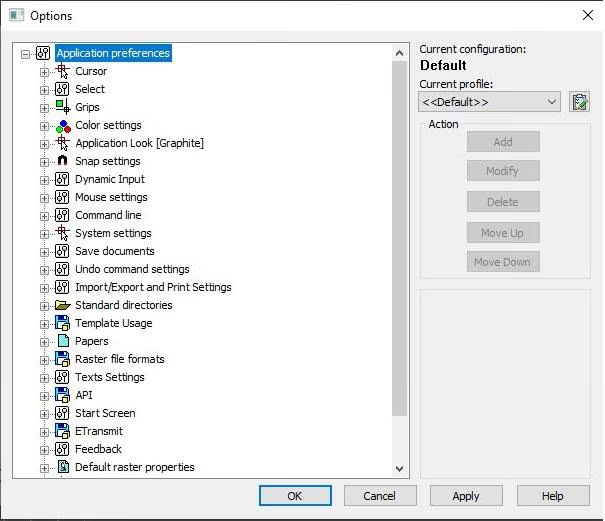
These settings are stored in the Windows Registry. To move them to another workstation, save a profile with the extension *.wip and import it on the other workstation. Under Standard directories the paths of the folders are set up below.
Standard directories
nanoCAD installs support files for linetypes, fonts and hatch patterns. Their locations are listed under AppData and ProgramData Windows.
SHX files
In nanoCAD 26, font and shape files *.shx are by default in:
C:\ProgramData\Nanosoft AS\nanoCAD x64 26.0\SHX
DWG files do not embed SHX fonts. If a drawing uses custom fonts, copy the *.shx files to nanoCAD’s SHX folder or add their location under Options → Standard directories.
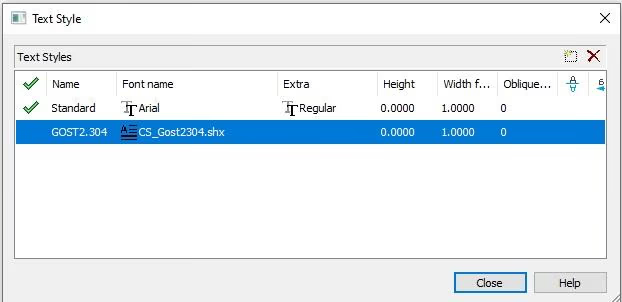
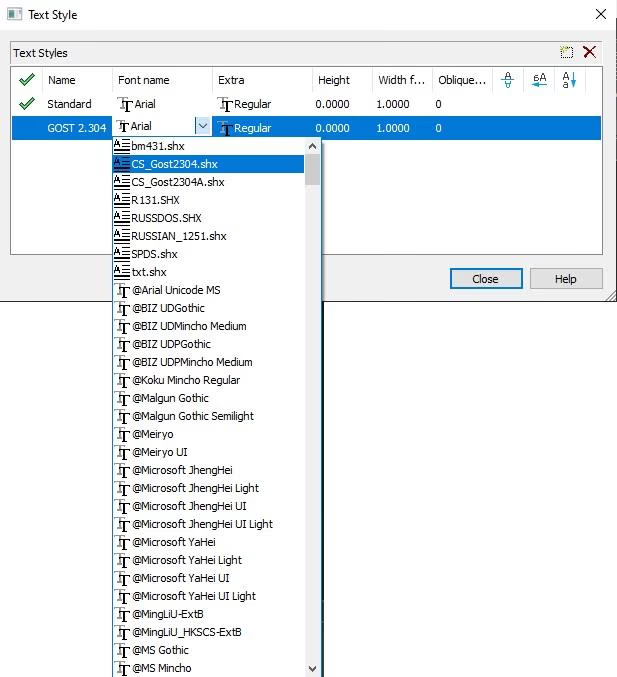
nanoCAD can use TTF fonts installed in Windows. The installer also includes the font CS_Gost2304.shx, used by the GOST 2.304 style of text.
Hatch patterns and linetypes
The SHX folder also contains linetype files *.lin and hatch patterns *.pat. The file ncadiso.lin can be edited in any text editor. Add your custom linetypes at the end of the file so you can find and copy them when you upgrade.
You can load linetypes into DWG drawings and DWT templates from within nanoCAD:
- Open Home → Annotation → Linetypes.
- In the Linetype Manager, choose Load Linetype.
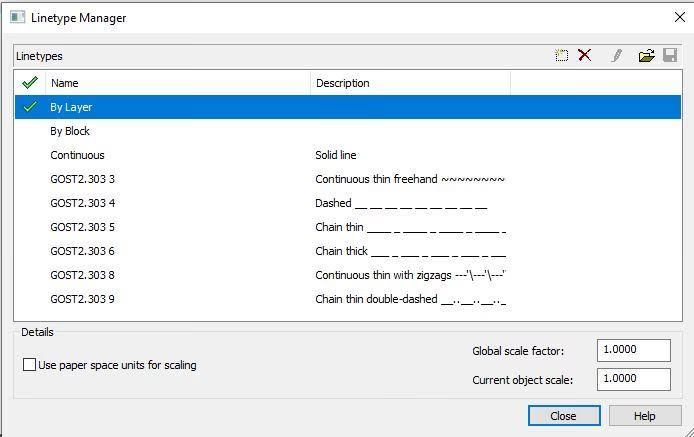
The file GOST 2.303–68.lin ships with nanoCAD. You can load its linetypes into DWG drawings as well.
DWT drawing templates and DST sheet sets
Files *.dwt are drawing templates. New DWG drawings inherit their settings, including:
- Units.
- Drawing modes.
- Layers and their properties.
- Linetypes.
- Dimension styles.
- Text styles.
- Layouts, views and scales.
- Plot settings.
In nanoCAD 26, templates are saved by default in:
%AppData%\Nanosoft AS\nanoCAD x64 26.0\TemplatesThe AutoCAD template folder varies by version and language. It’s usually under
C:\Users\<usuario>\AppData\Local\Autodesk\AutoCAD <versión>\...\TemplateTo create a template, set up the drawing settings and styles you need, then save the drawing as a DWT file.
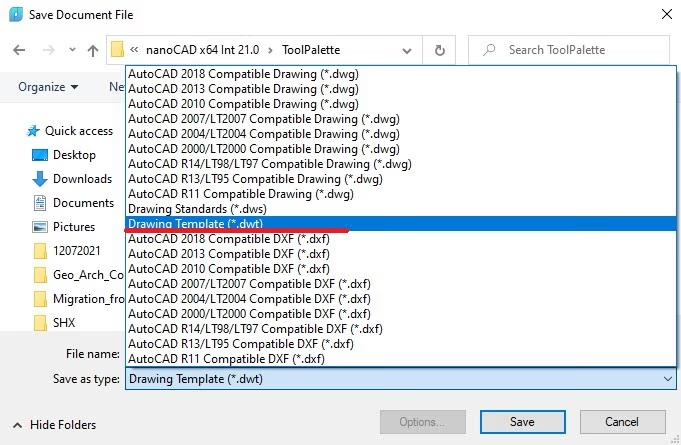
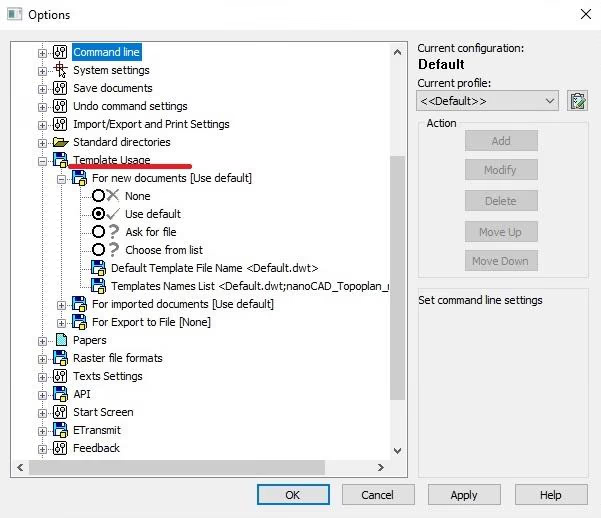
To reuse AutoCAD templates, copy the required DWT files to the nanoCAD template directory or add your folder to the standard directories. Then run OPTIONS and configure Use of templates: you can select a path, set a default template or display a list when creating new documents.
The nanoCAD and AutoCAD template folders may also contain DST files for sheet sets.
DWS Standards Files
Files *.dws Each organization defines its own drawing standards. To create a standards file, open a DWT template that contains the settings and styles you need, then save it as a DWS file.
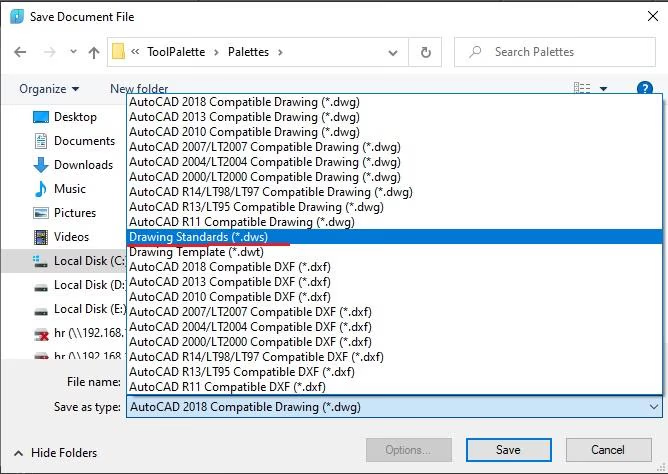
To link a standard to new drawings created with a DWT template:
- Open the DWT file and execute the command
STANDARDS. - In the window Configure Standards, press the +.
- Select the DWS file.
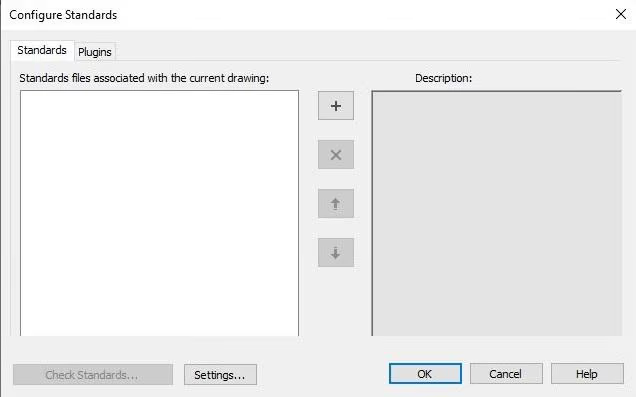
Keep linked DWS files at a consistent path so the template can still find the standard when you move it to another computer.
Standard directory transfer
AutoCAD auxiliary files can be moved to nanoCAD in two ways:
- Copy files: transfer them from AutoCAD folders to corresponding nanoCAD folders.
- Add the original location: add the existing AutoCAD folder to the list of nanoCAD standard directories.
For example, to add a folder of SHX fonts:
- Open Options in nanoCAD.
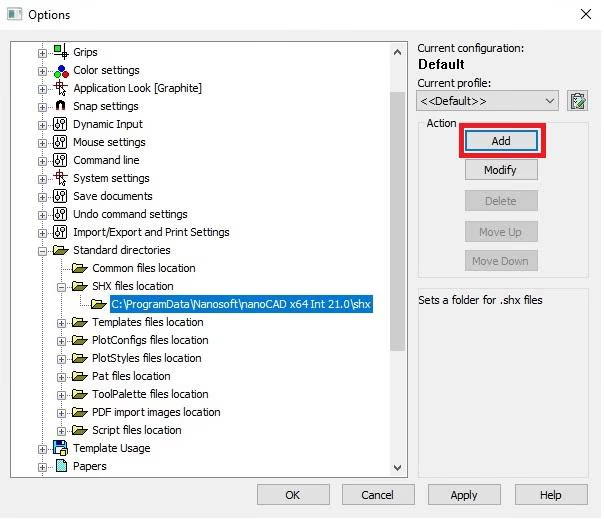
- Expand Standard directories.
- Select Location of SHX files and click Add.
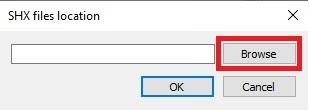
- Click Browse.
- Locate the font folder and confirm with OK.
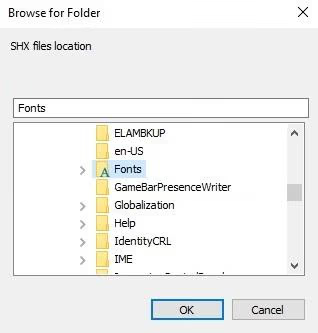
Restart nanoCAD to see the new fonts. Under Standard directories, you can add a folder or change an existing path.
Plotter configurations and plot styles
In nanoCAD 26, the default location for plotter configurations is:
%AppData%\Nanosoft AS\nanoCAD x64 26.0\PlotConfigs
These files store plotter settings. To reuse a custom AutoCAD configuration, copy the files from the AutoCAD folder Plotters. The exact location depends on the version and language installed.
nanoCAD’s named plot styles *.stb and color-dependent plot styles *.ctb are stored in:
%AppData%\Nanosoft AS\nanoCAD x64 26.0\PlotStyles
In AutoCAD, these styles are usually stored within Plotters\Plot Styles. Copy only the files your drawings use and print a test sheet before sharing the settings with your team.
Tool palettes
Tool palettes group resources such as blocks, sheet formats, linetypes and table libraries. A palette can also apply preset layers and properties. Related palettes can be organized into groups and sets.
To open them, use Manage → Palettes → Tool Palettes. In nanoCAD 26, palette files and the catalog NcTcCatalog.ntc are stored in:
%AppData%\Nanosoft AS\nanoCAD x64 26.0\ToolPaletteTo transfer a custom palette from AutoCAD:
- Open the palette in AutoCAD.
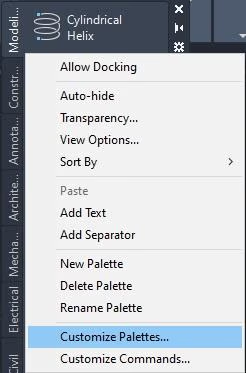
- Right-click an empty space and select Customize Palettes.
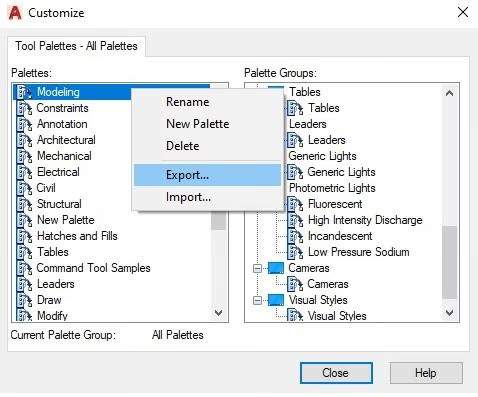
- In the customization window, right-click on the palette you need and select Export.
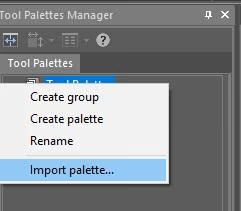
- In nanoCAD, open the context menu of Tool palettes and select Import Palette.
- Select the file
*.xtpexported from AutoCAD.
To replace the existing sets, back them up first, then clear the contents of the folder ToolPalette. This operation replaces the current configuration of the palettes.
Drawing element settings
The parameters of the design elements are managed from the window Design Settings, which opens with command PARAMS. You can adapt these elements to your company’s standards. The supplied configuration uses ISO standards as a reference.
To edit the general parameters, open Design Settings → Main Options → General Settings. The title bar shows the path of the XML file containing the current configuration.
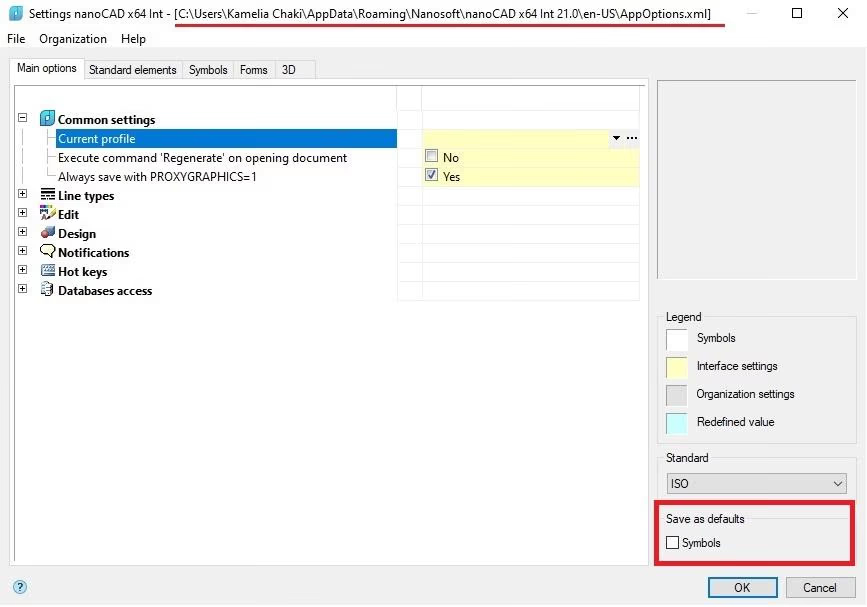
Select Save as default to keep changes in subsequent sessions.
To move the configuration to another workstation:
- In the Design Settings window, select File → Save Settings as.
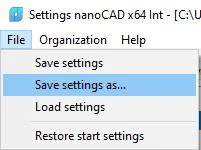
- Copy the XML file to the folder for the language used on the other workstation. The original example uses
%AppData%\Nanosoft AS\nanoCAD x64 26.0\en-USFor the Construction and Mechanica modules, the folders indicated in the original article are:
%AppData%\Nanosoft AS\nanoCAD x64 26.0\NanoSPDS\en-US
%AppData%\Nanosoft AS\nanoCAD x64 26.0\NanoMechanical\en-US- Open Design Settings and select File → Load Settings.
- Choose the transferred XML file.
Database
The nanoCAD Platform database includes table templates. Specialist modules add a library panel with sheet and table templates, preset sets, groups, markers and examples. You can also import and export folders of your own content.
nanoCAD supports PostgreSQL and Microsoft SQL Server. A network installation uses PostgreSQL by default.
To change the database in an existing installation:
- Run the command
PARAMS. - Under Main options, open Access to databases.
- Click the ellipsis button next to Data source.
- Enter the server and database for a network connection, or browse to the local database file.
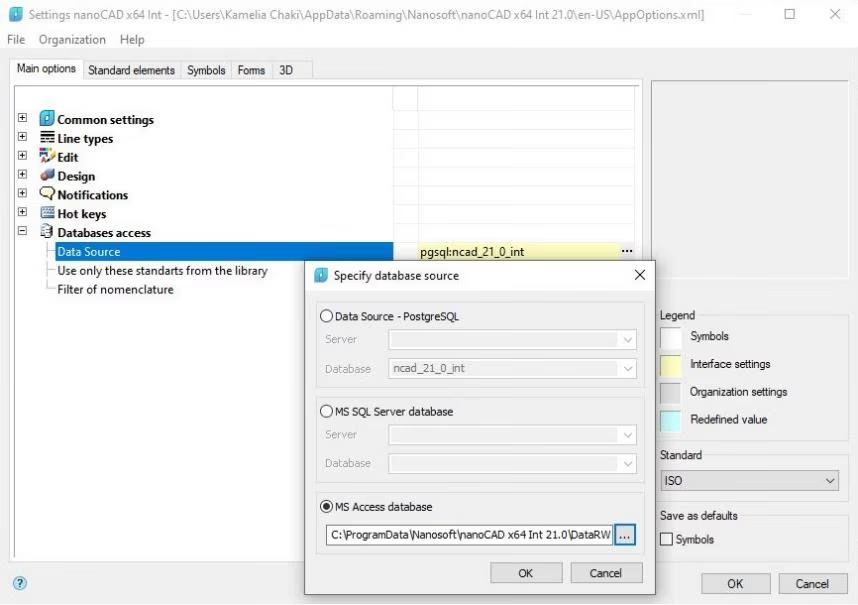
For a deployment package that uses a networked Microsoft SQL Server database, consult the installation guide for your version.
In Construction and Mechanica, you can add folders to the default library. If the library uses a network database, the configuration utility can publish those folders to other workstations.
To export elements from the Construction or Mechanica library:
- Open the Library panel by running
TABS. - Right-click on the folder you want to transfer and select Export object.
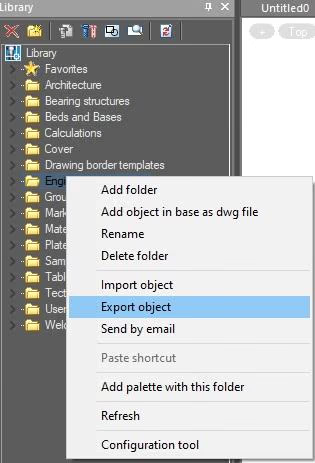
- Choose the destination folder.
- nanoCAD will create a file
*.mcdiready to import.
To import the library into Construction or Mechanica:
- Open the panel Library panel by running
TABS. - Right-click the top line of the library and select Import Object.
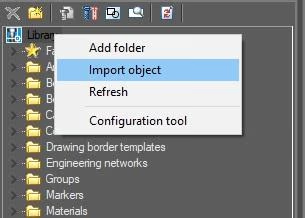
- Select a file in
*.mcdior*.mcd. The imported folder will appear in the library with the file name.